Showing posts with label Acre House. Show all posts

Jan 25, 2017

Acre House Dining Room

The kitchen in this house opens up to the family room, but the dining room is completely separate.  My first thought when we saw this home was that we should tear down a wall or two to open it all up.  Then, within minutes, I completely changed my mind.  I know separate dining rooms are not what is "all the rage" right now.  However, separate dining rooms have their perks.  

Perk # 1:  No distractions.  No one is watching tv while eating and everyone can just focus on the food and each other.  I like that.  A lot, actually.  It simplifies meal time and I feel more connected to my family.

Perk # 2:  We can't see the kitchen.  I'm more relaxed when I sit down and eat with my family and I can't see the dirty dishes from meal prep, strewn across the counter tops and filling up the sink.

I know separate dining rooms aren't for everyone, but if you have one... enjoy it.


Above is the picture taken by someone within the realty company before we bought our house.  Great structure.  Love the archway going into the living room and I love the big window.  The cons for us were carpet in the dining room (I guess we're messy people) and the paint color and light fixture were dated and not my style.  


Here's another shot of the room from a different angle, about two days after we moved in.


This is the dining room today.


I know the quality of the picture above is horrible, but it's the only one I have, at the moment, of the whole room.  

These are the changes we've made so far:  

New laminate flooring (flowing into the other main living areas too), new paint, and new light fixture.  

There are a couple of things we still need to do in here.

We still need to finish the base molding and I'd really like a longer dining room table.  My husband and I saw a dreamy one at Costco yesterday.  It came with chairs and everything.  It was a fabulous deal, totally on sale, but when you haven't saved up for a new dining room table yet, a fabulous deal is still too much money.  Ugh!  It's hard to walk away from something you totally love when the funds aren't there.  But we did the mature thing and walked away. :(


On the Opposite wall of the window, we have this old dresser that we've had forever.  It holds some entertaining decor and other odds and ends.  I love that the top of it can serve as kind of a buffet table during big holiday dinners or other special occasions too. 


I bought this green metal container from a lovely gal on instagram.  It holds extra napkins and multiplication cards, which I know is random.  However, my youngest is in third grade and is learning multiplication in math this year.  Having these flash cards out and easy to access, makes memorizing all those facts a little easier, when all we have to do is sit at the dining room table and grab a few to memorize every day.  I'm all about making a space pretty, but even more importantly, functional and usable for my family.  This metal container is one of those pretty + useful pieces of home decor, which are my favorite kind.


While our current dining room table is feeling smaller and appears more dinged up, as the years press on,  I'm still trying to make the best of it.  I decorated the top of it with a scrap of black and white gingham material, some layered wood slices (from some trees around our property we had to cut down), and some white battery operated candles. 


Here's another angle of the dining room from the open kitchen/family room area.


Last weekend, I finally hung some framed pictures on either side of the arched doorway.  It's so nice to see them on the wall and not just stacked somewhere collecting dust (like they had been for the last six months).


Each picture holds a memory that has become a little conversation starter as we eat dinner.  I'd highly recommend hanging a gallery of family pictures somewhere near your dinner table.  :)  Most of the framed pictures are not fancy.  Half of them are printed from pictures I took on my phone.  It's awesome being able to see them in print everyday!


Last picture.  I know the quality is bad, but I love that big sign on top of the dresser, "gather."  It describes the whole meaning and everything that I love about this room.

Jan 17, 2017

Acre House Family Room Update


Most of the rooms in our current home are a little bit bigger than the rooms in our last house.  This is a picture of our family room, taken by the realtors selling this home.  The space is great.  We love the arched doorways and the carpet was brand new. 


This room has a skylight and I love the natural light it lets in.  While there's really nothing wrong with this space, we still wanted to make a few changes to add better flow and a bit of character.  To make this room flow with the rest of the main areas of the house, we painted all of the walls the same color (Dolphin Fin by Behr).  This is the same color paint I used in our split level.  The other thing we did was rip up the carpet (we gave it to some friends because it was still new) and we installed a water proof laminate from Home Depot.  This helped with the flow a lot because the hallway, family room, and dining room had carpet.  The kitchen had an older linoleum, and the living room and entry had a newer linoleum.  Now they all have the same flooring and it makes these areas seem bigger, even though nothing, as far as square footage, has changed.  


Here you can see the newly installed laminate.  In person, it has a lot of texture and a bit of that hand scraped look.  We're pretty happy with it.  However, despite new flooring and a fresh coat of soft grey paint, the room still felt very plain.  That long wall with the tv against it felt too long and open.  So we did what we've done in every home we've ever owned. 
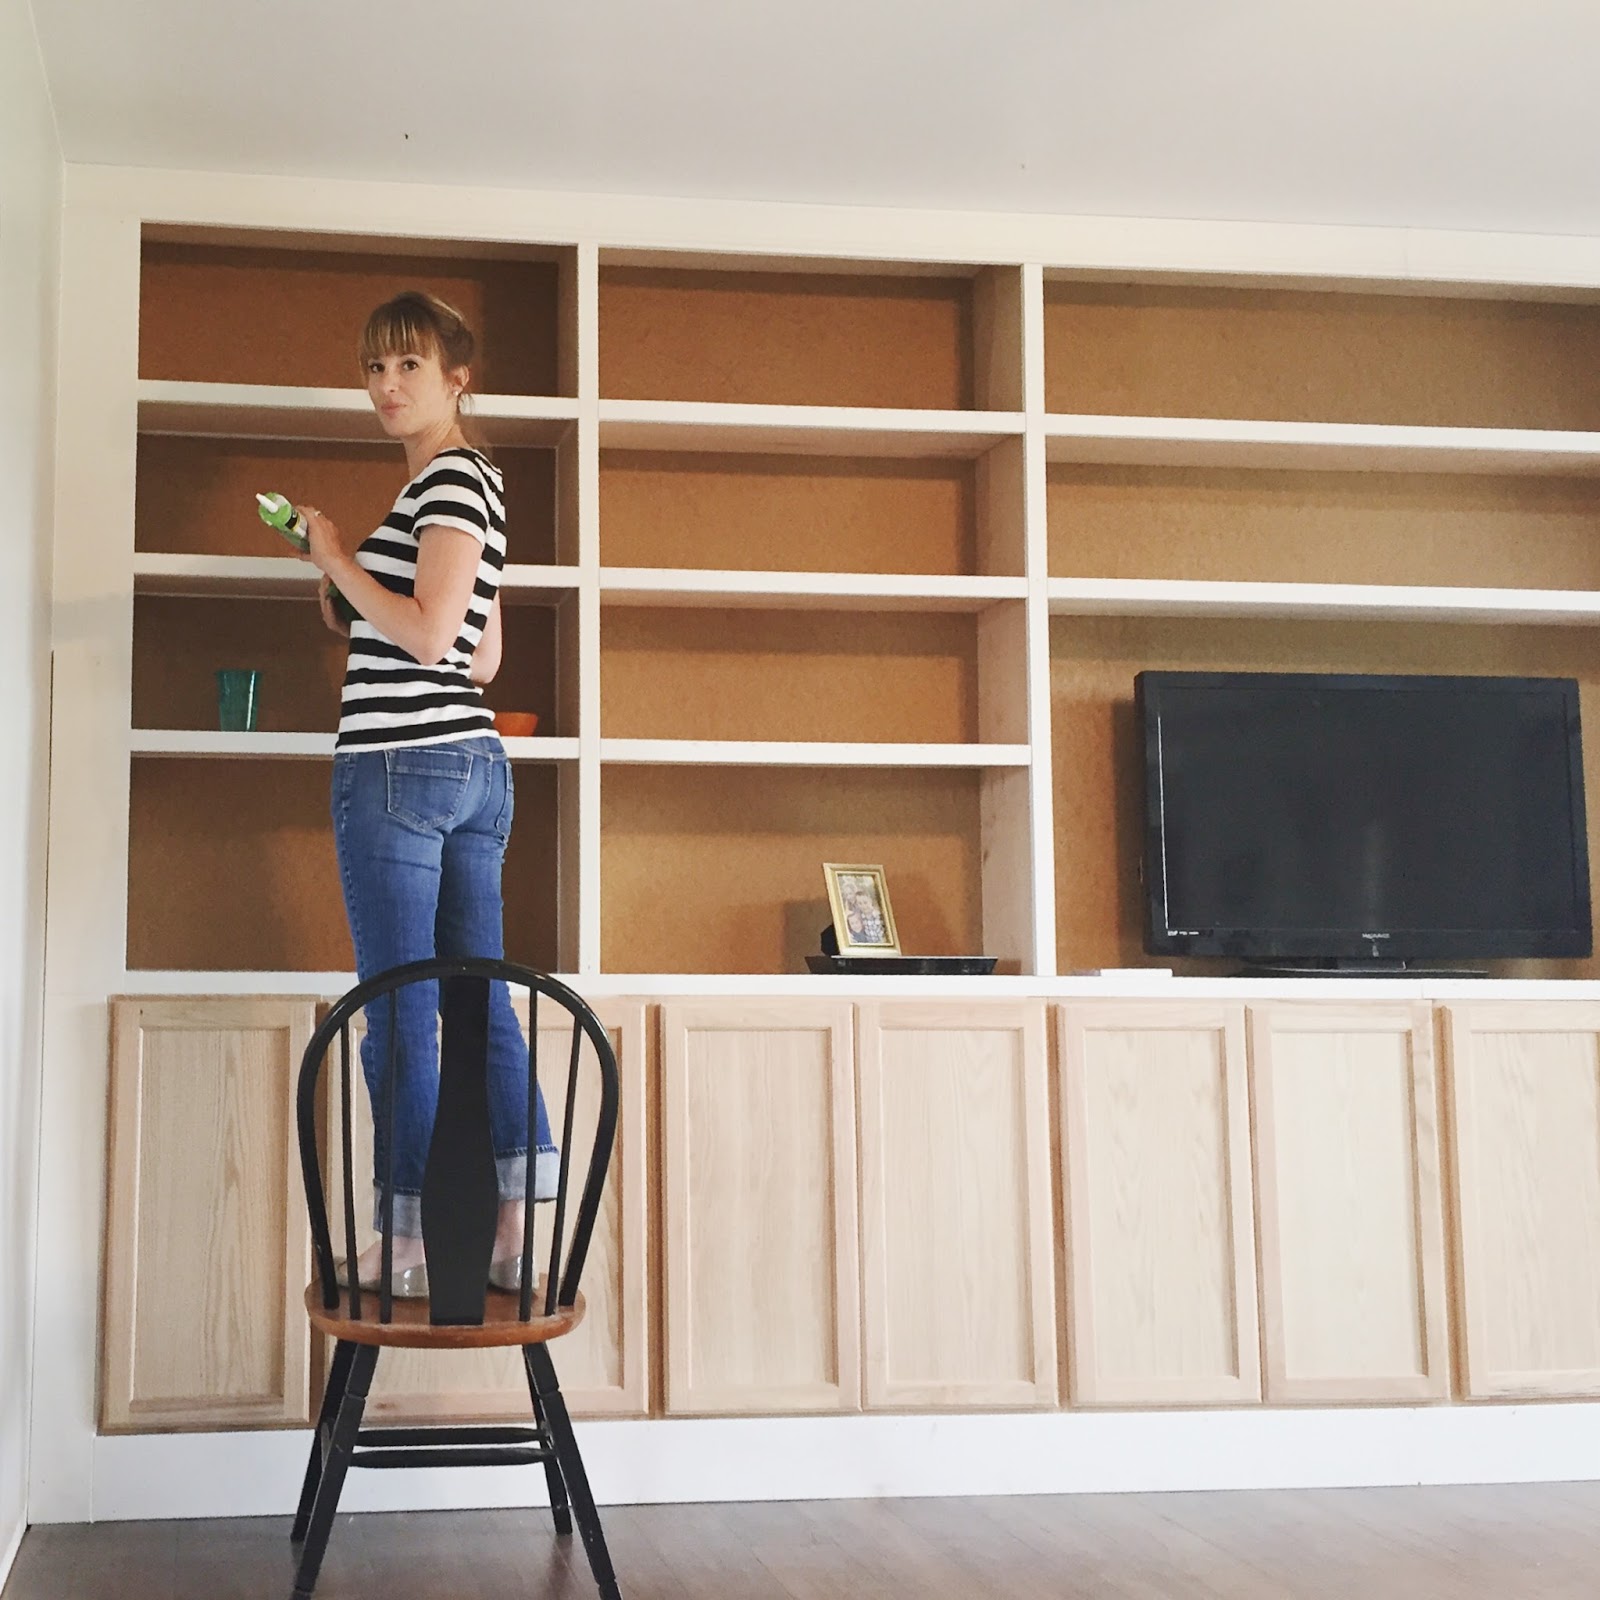
My husband installed built ins.  We did them a little different than we've ever done them before though.  This time, instead of building the lower cabinets by hand (hard and time consuming), we found the idea to use stock upper cabinets.  My husband built a base, about six inches tall.  Then he added some stock upper cabinets from Home Depot to the base. 
Using cabinet grade 3/4 plywood, he built the shelves, with backer-board to give the back of the built-ins a nice smooth surface.  He used small mdf molding to finish each shelf out.  The molding gives the illusion that the shelves are made with thicker wood.  He also used wider 5.5 inch mdf molding to finish out the built-ins around the top and sides.


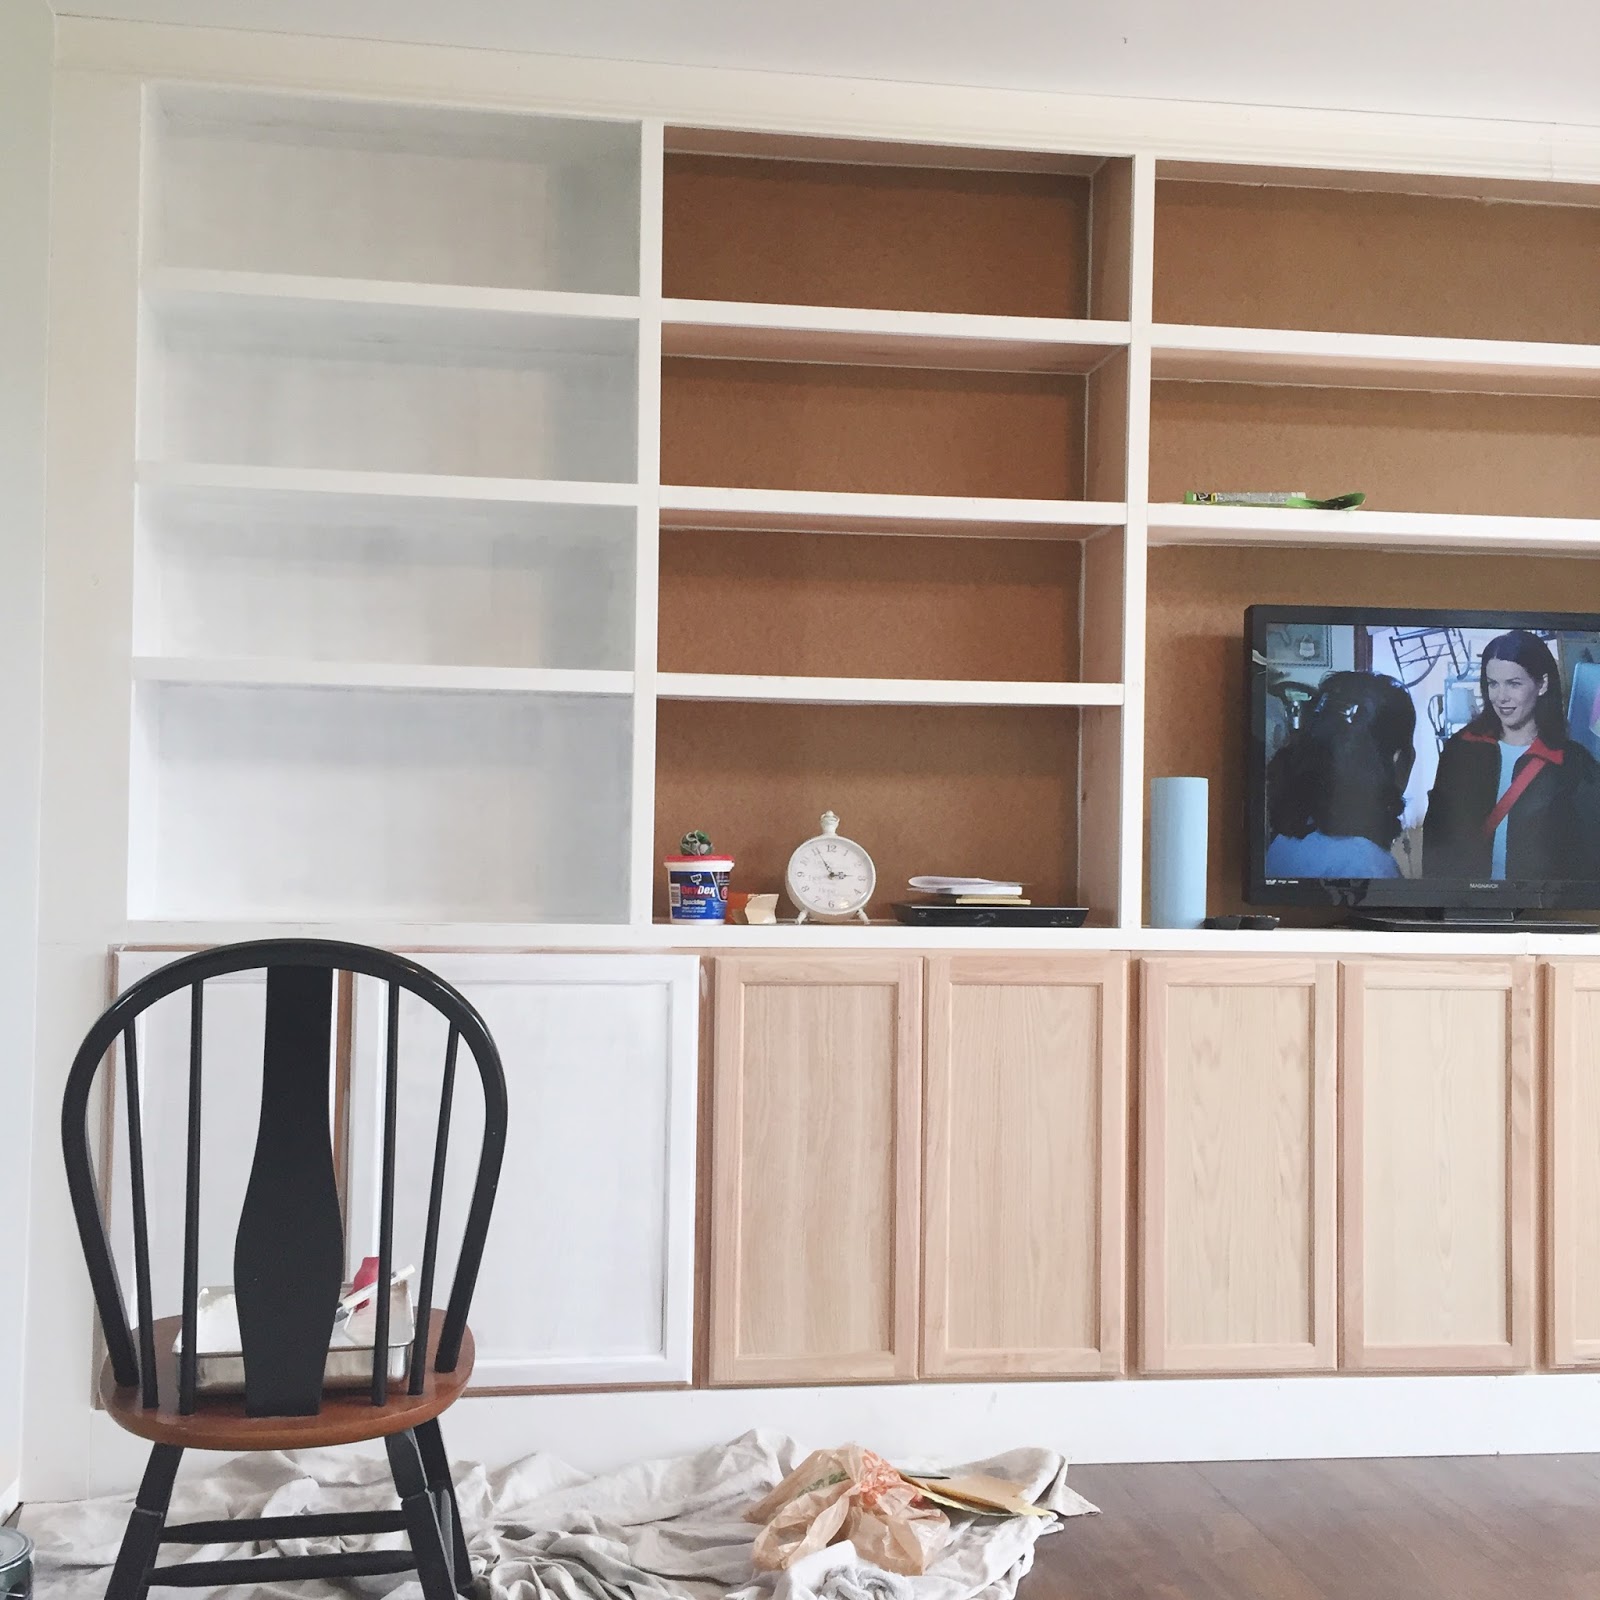
Every household has their own system.  The system that works in our household is that my husband does the building and I do the finish work.  So here I am calking every seam and nail hole.


Painting tends to be my job too.  As long as I have something to listen to, on this particular day - Gilmore Girls - it's a pretty relaxing task.


Again, here is a view of how this room looked when we first walked through it.


Here it is today, just peaking through the arched doorway.


This is mOst of the entire wall. It's so long that it's difficult to get the entire length of built-ins in one picture.  But that's a great problem.  These offer so much storage.  As soon as they were completed, I was finally able to unpack the last of the boxes from our move... The games, binders full of family pictures, books, decorative items, DVD's, CD's, etc.  All of that is either displayed on the top shelves, or neatly stored and happily hidden in the bottom cabinets.


This is the wall opposite of the long built-in wall.  Just a cozy corner for watching Netflix, hanging out with friends, or doing homework.


Here, again, is the far wall just to give you a bit of a before perspective of this side of the room.


Here is the after.  This corner is now the "office" space, with old metal file holders, spray painted and screwed to the wall and a desk, sitting nicely below the only window in the room.


The curtains frame this little area and make it feel cozy.


This is the rest of the wall between the window and the door leading to the back deck.


Just another side view of this whole wall.  
You know, It's funny.  (But not funny.)  No part of this room came together seamlessly for me.  Well, except for the flooring and the built-ins...  we had visions of doing those things before we signed on the dotted line to take ownership of this house.  

The hard part was that it was a different layout than the family room in our previous house that I was used to.  I found myself, at first, having no idea where to place furniture or how to decorate.  For the longest time, it didn't even feel like home.  As I just let things be for awhile, slowly our families routine and our needs for this room, shifted pieces of furniture and such to where they are today.  I was silly enough, at first, to think that I needed to get this room just right and perfect, all at once, without letting it just naturally evolve over time.  Too often I put unneeded pressure on myself about these kinds of things.  I wanted the transition of moving to feel seamless for my family and I.  In reality, moving and settling in just takes time.  After living here for seven months, this place finally feels like home. 

Jan 6, 2017

Acre House Entryway Before + After


I really came to love the split level home we fixed up before we moved here.  However, I was never very fond of it's entryway.  It was tiny and felt very awkward when letting visitors in.  One of the many pluses to this rambler is that we can invite people in with room to spare.  While this space may seem very common to some, the openness of this entry feels like a new luxury to me.


The existing flooring was made up of newer carpet and linoleum.   I know it totally looks like wood or laminate in the picture, but it's not.  The variety of flooring this house had, made it feel choppy to us.  So within the first few months, we tore out all of the flooring in the main living areas.  We replaced it with a water proof laminate found at Home Depot.  A couple of the other things we did right away in this area, was new paint (Dolphin Fin by Behr - still a favorite of mine) and we replaced the entry light fixture.


After fresh paint, new flooring, and a new light, my husband installed pine tongue and groove planking just to this one wall here. 


Okay, so this is real life when you're moving in and renovating at the same time.  It's a beautiful mess, but it's real.  I loved how the planking turned out.  So pretty.  I ALMOST considered leaving it raw and unpainted.  But I'm a white and gray decor kind of girl, so the final decision was to paint it white.


 Here we are today.  All moved in and this space now feels more "us".


Here's another glance from a slightly different angle.  Sorry for the blurry picture.  I got a new camera for Christmas and I'm still struggling with how to use it.  Sometimes what looks like a crisp picture to my eye when I'm taking the picture, isn't really so crisp.  I've got some learning to do. :)

I reused these hooks that used to hang in the entry in our old house.  They are the perfect combination of nice to look at and useful.  Lately I've been learning something about myself and decor.  If it can be BOTH pretty and functional, I love it!  Sometimes I have a hard time buying things that are just for looks. Not that I never do, but I like the simplicity of pretty + useful.


I recently purchased this jute rug from Rugs USA.  I love jute rugs for the entry because they can take a beating and this area gets a lot of traffic.  My husband built the bench out of some old wood we had and some industrial metal legs I bought on Amazon.  Another tiny update to this area was some paint on the front door.  I painted it black, but this section of the house doesn't get a lot of natural light.  So I may need to rethink the black and go with something a shade or two lighter.  We'll see.


 Hello!


I tried to be intentional with the things I hung on the walls in here.  We go in and out the front door several times a day.  The first things you see when coming in are a picture of Christ, a picture of the Prophet (Thomas S. Monson - President of The Church of Jesus Christ of Latter-day Saints), and one of our favorite quotes from the Prophet. "May we ever choose the harder right, instead of the easier wrong."
 

I also placed a small clip board in the window sill, next to the front door.  I can clip different scriptures here throughout the year that we are trying to learn or memorize.


The last thing I hung in the entry was this oval mirror.  Just in case we want to glance at ourselves before we head out for the day.  This mirror has some sentimental value.  It used to be bright yellow and hang in my room when I was a baby.  It made it's way into my younger sister's room when I was growing up too and then finally landed in my lap again.

This house has really good bones.  We've only made changes to it that made it feel more like "us" rather than the previous owners.

Next week I'll try to share some updates we made to the family room.  Until then, have a good day and stay warm!  Our winter, so far this year, has been brutally cold!

Jan 2, 2017

Painted Kitchen Tile Backsplash


A couple of months ago, I painted the back splash in our kitchen.  The tile was fine and in perfect shape, it just wasn't my style.  My first choice would have been to rip the tile out and add white subway tile.  However, in order for that to happen, the tile would have to be installed on top of the edge of the counter top where it meets the wall.  Long term, we won't be keeping these counter tops. So we didn't want to install a new back splash, that would rest on the old counter top, when later we'd have to rip it out to install a new one, causing havoc on the back splash.  Not sure if that makes sense, but anyway, we needed a less permanent solution.  So in came the wonderful magic of oil based paint.


Just so you have an idea of how far this kitchen has come since we moved in, the picture above is from seven months ago when this home was still on the market. 


Five months after living here, this kitchen has new laminate flooring, a new light fixture, painted cabinets, and new hardware.  Painting the back splash just kind of pulled it all together one step further.


The process was simple, except for the fact that I had zero experience with oil based paint.  I'll share one rooky mistake I made so that if you decide to tackle a project like this, you can avoid the mess up I made. 


The first step is to clean all of the tile so the paint will adhere well.  Let it dry well.

Step two, remove any outlet covers around the tile and tape off everything around the tile you don't want paint on.  Unlike water based paint, oil will not wipe off.

Step three, use a good primer (I used Zinsser 1,2,3.  It adheres well to anything and can be found at Home Depot and probably several other places.)  I used a roller to get primer on the big stuff and the edge of the roller to get all of the smaller grouted areas.  This primer dries fast.  So if you're in a hurry, you can follow step four within a couple of hours.

Step four, use an oil based paint to paint over the primer.  I chose a bright white from Behr, right off the shelf.  Just some important notes here...
  • Use a high quality brush, not a roller.  Rollers are harder to work with when you use oil based paint.
  • Use a Semi Gloss or a Gloss sheen.  I used a Semi Gloss sheen for durability and slight shine.  
  • Wait at least one day between coats of oil based paint and watch out for any moisture in the area! (rooky mistake)
STEP FIVE, is super important.  Two coats of paint are required for an even finish.   After coat number one, wait 24 hours before applying coat number two.  Even after my first coat was applied and I had waited 24 hours, that first coat was still sticky to the touch.  Luckily by coast number two, the paint hardened pretty quickly.  The silly silly mistake I made was when dishes were piling up in the sink and I had my son do his weekly dishes chore.  Only one coat of paint had been applied at this point.  Water droplets/Moisture had landed on the back splash directly behind the sink.  So when I applied coat number two, the paint would not adhere smoothly and I was left with a bit of a streaky crackled look.  Lesson to learn here... Don't do the dishes when you're painting your back splash!!!  In fact, if you can, avoid using the sink at all!  


Water and oil don't mix.  I don't know why my brain didn't compute that common knowledge during this process. It's kind of hard to tell, but in the picture above, you can kind of see the unevenness on the tiles around the sink.  Luckily when you stand back, it's not super noticeable.


I love the transformation.  It was a fairly easy fix for not an enormous amount of money.  I already had the primer and the painters tape, so all I had to buy was a nice paint brush and the paint.  An under $30 kitchen back splash solution.
Related Posts Plugin for WordPress, Blogger...